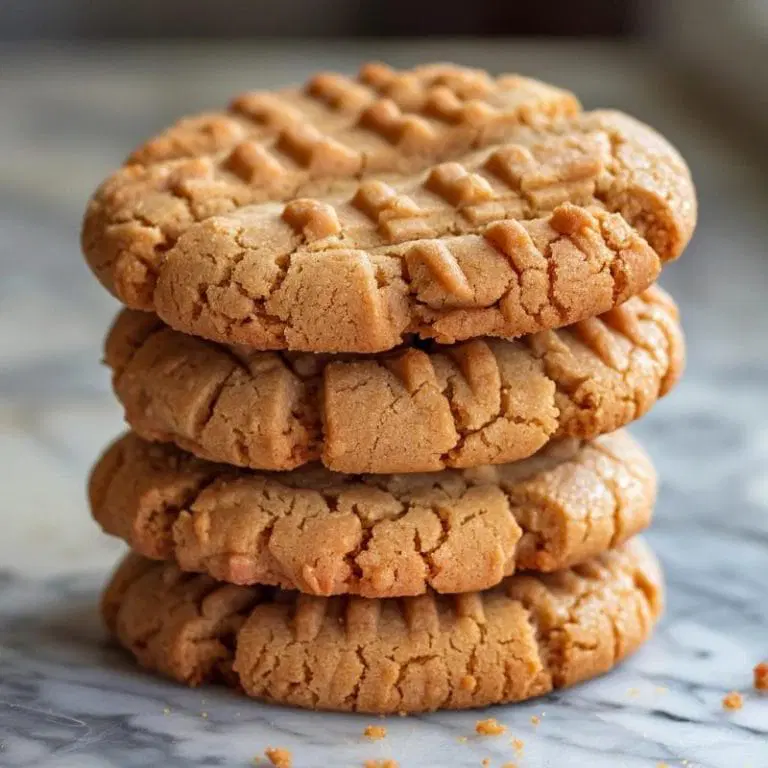
There’s something incredibly heartwarming about baking cookies, especially when they come from a cherished family recipe. Grandma’s Peanut Butter Cookies are one such treat that holds a special place in my heart and in the hearts of many. These cookies evoke fond memories of cozy kitchens and the sweet, nutty aroma wafting through the house. Every bite is a delicious reminder of simpler times and the love that goes into making homemade treats.
I remember the first time I made these cookies on my own. I was in my early teens, trying to recreate the same magic that my grandma could so effortlessly achieve. The dough came together so easily, and as the cookies baked, the smell filled the house just like it used to. Sharing them with family and friends, I saw their faces light up with joy, much like mine did when I enjoyed them as a child. These cookies are not just a recipe; they are a piece of my family’s history and a testament to the comfort of homemade baking.
Here’s how you can recreate this timeless treat in your own kitchen.
Ingredients
1 cup creamy peanut butter
1 cup white sugar
1 large egg
1 teaspoon baking soda
½ teaspoon baking powder
A dash of salt
Instructions
Step 1: Preheat Your Oven
Begin by preheating your oven to 350°F (175°C). This is a crucial step as it ensures that your cookies bake evenly and develop that perfect golden-brown color.
Step 2: Prepare the Dough
Mix the Ingredients
In a sizable mixing bowl, combine 1 cup of creamy peanut butter with 1 cup of white sugar. These two ingredients are the foundation of your cookie dough, providing a rich, sweet, and nutty flavor.
Add the Egg
Crack a large egg into the bowl. The egg acts as a binding agent, helping to hold the ingredients together and contribute to the cookie’s texture.
Incorporate the Leavening Agents
Stir in 1 teaspoon of baking soda and ½ teaspoon of baking powder. These leavening agents will help the cookies rise slightly and achieve a tender crumb. Also, add a dash of salt to enhance the overall flavor of the cookies.
Blend Thoroughly
Mix all the ingredients together until well combined. You should end up with a smooth and slightly sticky dough. If the dough feels too soft or sticky to handle, you can chill it in the refrigerator for a few minutes to make it easier to shape.
Step 3: Shape the Cookies
Form the Dough Balls
Use your hands or a cookie scoop to shape the dough into 1-inch spheres. Arrange the dough balls on a cookie sheet. For best results, use a cookie sheet that is not greased; the cookies will spread just enough on their own.
Add the Criss-Cross Pattern
Take a fork and gently press down on each dough ball. Create a criss-cross pattern by pressing the fork down once in each direction. This classic design not only gives the cookies their signature look but also helps them bake evenly.
Step 4: Bake the Cookies
Bake to Perfection
Place the cookie sheet in the preheated oven and bake for 8-10 minutes. The cookies should turn a golden brown at the edges but remain soft in the center. Keep a close eye on them to ensure they don’t overbake.
Cool and Enjoy
Once baked, remove the cookies from the oven and let them rest on the cookie sheet for a few minutes. This allows them to set and makes them easier to transfer. After they’ve cooled slightly, move them to a cooling rack to cool completely. The cooling rack prevents the cookies from becoming soggy and helps them maintain their crisp texture.
Variations and Substitutions
Add-Ins: Feel free to mix in chocolate chips, peanut butter chips, or even a handful of crushed nuts for added texture and flavor. A sprinkle of sea salt on top before baking can also enhance the taste.
Sugar Substitutes: If you’re looking to reduce sugar intake, you can use alternatives like coconut sugar or a sugar substitute designed for baking. However, keep in mind that these substitutes can alter the texture and flavor slightly.
Nut Butters: For a twist, try using different nut butters such as almond or cashew. Each will bring its own unique flavor to the cookies.
Gluten-Free Option: If you need a gluten-free version, ensure that the baking powder and any added ingredients are certified gluten-free. The recipe as written is already gluten-free.
Summary
Grandma’s Peanut Butter Cookies are more than just a delightful treat—they are a nostalgic journey to simpler times, capturing the essence of homemade comfort. The combination of creamy peanut butter, sweet sugar, and a hint of salt creates a perfect balance of flavors. The process of making these cookies is straightforward, and the result is a batch of cookies that are both satisfying and memorable. Whether you’re baking them for a family gathering, a special occasion, or just a simple treat for yourself, these cookies are sure to bring joy and a touch of nostalgia to every bite. Enjoy the baking process and the delicious outcome that awaits you!
